

FireSQL – Query Firestore Using SQL Syntax
29th July 2022
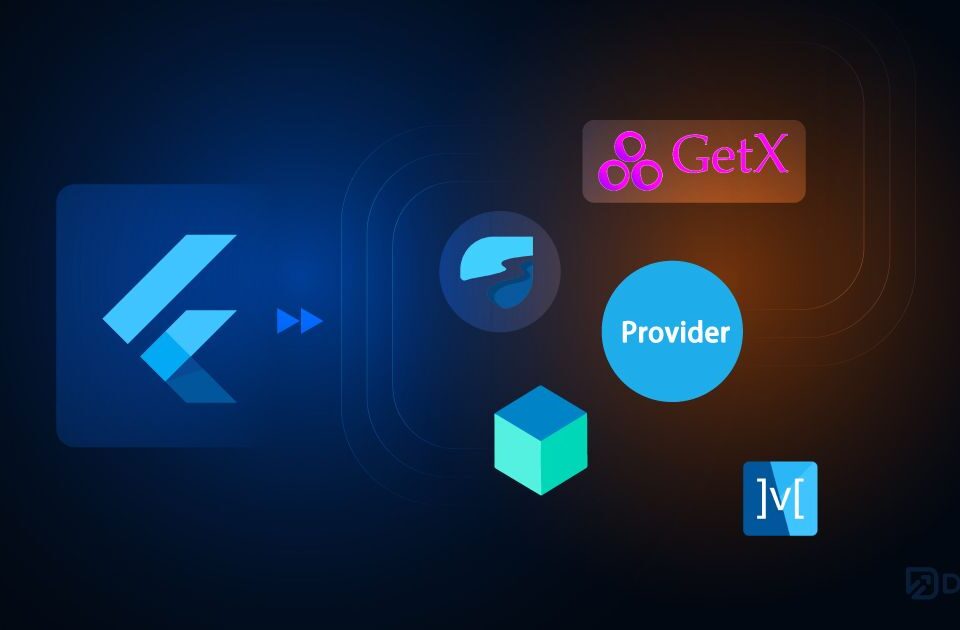
Best Flutter Development Company in Junagadh
14th August 2022
Understand the tech
The following figure shows the workflow to integrate into your app in order to add Video Call functionality.
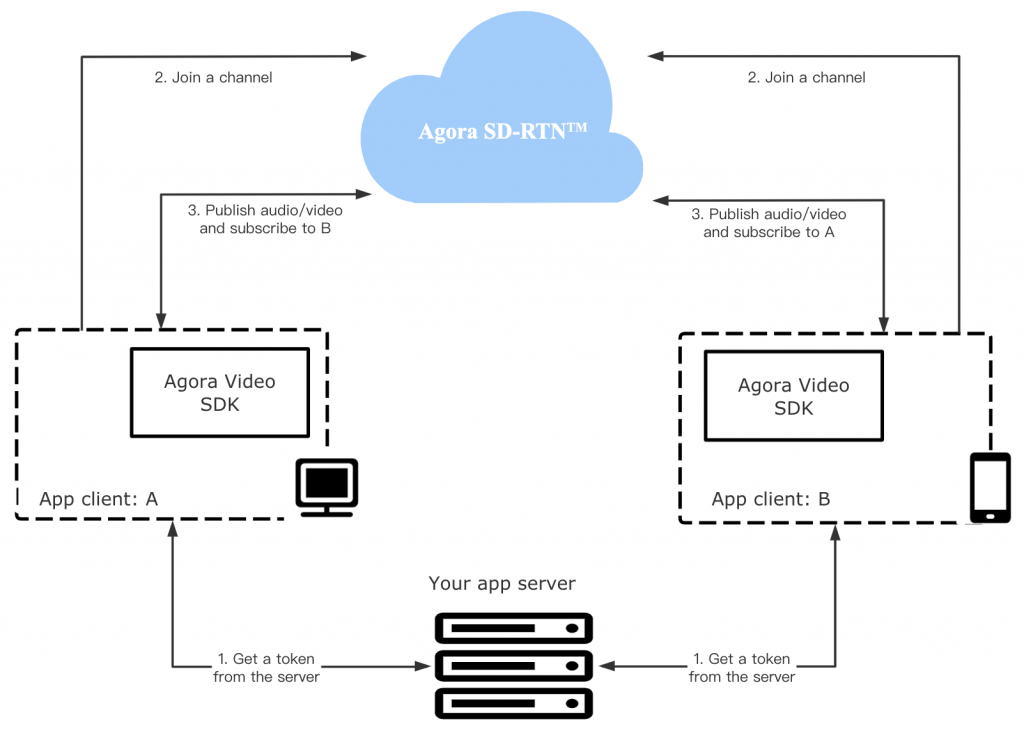
As shown in the figure, the workflow for adding Video Call in your project is as follows:
- Retrieve a token
A token is the credential that authenticates a user when your app client joins a channel. In a test or production environment, your app client retrieves tokens from a server in your security infrastructure. - Join a channel
Call joinChannel to create and join a channel. App clients that pass the same channel name join the same channel. - Publish and subscribe to audio and video in the channel
After joining a channel, the app client automatically publishes and subscribes to audio and video in the channel.
For an app client to join a channel, you need the following information:
- The App ID: A randomly generated string provided by Agora for identifying your app. You can get the App ID from Agora Console.
- The user ID: The unique identifier of a user. You need to specify the user ID yourself, and ensure that it is unique in the channel.
- A token: In a test or production environment, your app client retrieves tokens from a server in your security infrastructure. For this page, you use a temporary token with a validity period of 24 hours that you retrieve from Agora Console.
- The channel name: A string that identifies the channel for the video call.
Prerequisites
Before proceeding, ensure that your development environment meets the following requirements:
- Xcode 9.0 or later.
- An iOS device running iOS 9.0 or later.
- A valid Agora account.
- A valid Agora project with an App ID and a temporary token. For details, see Get Started with Agora.
- A computer with access to the internet. If your network has a firewall, follow the instructions in Firewall Requirements.
Project setup
In Xcode, follow the steps to create the environment necessary to add Video Call into your app.
- Create a new iOS app and configure the following settings:
- Product Name: Any name you like.
- Team: If you have added a team, choose it from the pop-up menu. If not, you can see the Add accountbutton. Click it, input your Apple ID, and click Next to add your team.
- Organization Identifier: The identifier of your organization. If you do not belong to an organization, use any identifier you like.
- Interface: Choose Storyboard.
- Language: Choose Swift.
- Integrate the Video SDK into your project:Go to File > Swift Packages > Add Package Dependencies…, and paste the following URL:
Implement a client for Video Call
This section shows how to use the Agora Video SDK to implement Video Call in your app step by step.
Create the UI
In the interface, you should have one frame for local video and another for remote video. In ViewController.swift, replace any existing content with the following:
import UIKit
class ViewController: UIViewController {
    var localView: UIView!
    var remoteView: UIView!

    override func viewDidLoad() {
        super.viewDidLoad()
        initView()
     }

    override func viewDidLayoutSubviews() {
        super.viewDidLayoutSubviews()
        remoteView.frame = self.view.bounds
        localView.frame = CGRect(x: self.view.bounds.width - 90, y: 0, width: 90, height: 160)
    }

    func initView() {
        remoteView = UIView()
        self.view.addSubview(remoteView)
        localView = UIView()
        self.view.addSubview(localView)
    }
}
Implement the Video Call logic
When your app opens, you create an RtcEngine instance, enable the video, join a channel, and publish the local video to the lower frame layout in the UI. When another user joins the channel, your app catches the join event and adds the remote video to the top frame layout in the UI.
The following figure shows the API call sequence of implementing Video Call.
To implement this logic, take the following steps:
- Import the Agora kit and add the
agoraKitvariable.Modify yourViewController.swiftas follows:import UIKit // Add this line to import the Agora kit import AgoraRtcKit class ViewController: UIViewController { var localView: UIView! var remoteView: UIView! // Add this linke to add the agoraKit variable var agoraKit: AgoraRtcEngineKit? override func viewDidLoad() { super.viewDidLoad() initView() } - Initialize the app and join the channel.Call the core methods to initialize the app and join a channel. In this example app, this functionality is encapsulated in the
initializeAndJoinChannelfunction.InViewController.swift, add the following lines after theinitViewfunction, and fill in your App ID, temporary token, and channel name:func initializeAndJoinChannel() { // Pass in your App ID here agoraKit = AgoraRtcEngineKit.sharedEngine(withAppId: "Your App ID", delegate: self) // Video is disabled by default. You need to call enableVideo to start a video stream. agoraKit?.enableVideo() // Create a videoCanvas to render the local video let videoCanvas = AgoraRtcVideoCanvas() videoCanvas.uid = 0 videoCanvas.renderMode = .hidden videoCanvas.view = localView agoraKit?.setupLocalVideo(videoCanvas) // Join the channel with a token. Pass in your token and channel name here agoraKit?.joinChannel(byToken: "Your token", channelId: "Channel name", info: nil, uid: 0, joinSuccess: { (channel, uid, elapsed) in }) } - Add the remote interface when a remote user joins the channel.In
ViewController.swift, add the following lines after theViewControllerclass:extension ViewController: AgoraRtcEngineDelegate { // This callback is triggered when a remote user joins the channel func rtcEngine(_ engine: AgoraRtcEngineKit, didJoinedOfUid uid: UInt, elapsed: Int) { let videoCanvas = AgoraRtcVideoCanvas() videoCanvas.uid = uid videoCanvas.renderMode = .hidden videoCanvas.view = remoteView agoraKit?.setupRemoteVideo(videoCanvas) } }
Start and stop your app
Now you have created the Video Call functionality, add the functionality of starting and stopping the app. In this implementation, a video call starts when the user opens your app. The call ends when the user closes your app.
To implement the functionality of starting and stopping the app:
- When the view is loaded, call
initializeAndJoinChannelto join a video call channel.InViewController.swift, add theinitializeAndJoinChannelfunction inside theviewDidLoadfunction:override func viewDidLoad() { super.viewDidLoad() initView() // Add this line initializeAndJoinChannel() } - When the user closes this app, clean up all the resources used by your app.In
ViewController.swift, addviewDidDisappearafter theinitializeAndJoinChannelfunction.override func viewDidDisappear(_ animated: Bool) { super.viewDidDisappear(animated) agoraKit?.leaveChannel(nil) AgoraRtcEngineKit.destroy() }
For more in formation contact XpertLab

