


iOS 17 New Features – Everything You Need to Know
6th October 2023
Serverless Framework V4: A New Model
27th October 2023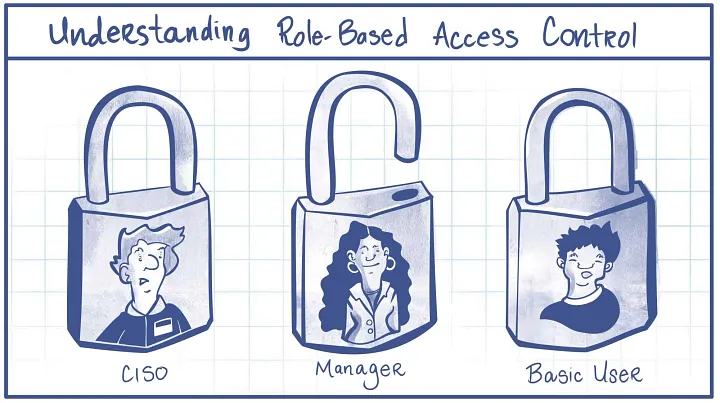
Introduction
This article will help you set up RBAC i.e Role-Based Access Control in your node application. RBAC allows us to provide permission to users based on their roles. We are often required to provide different roles to users to improve the security of the application.
Thus, we will be discussing an application with 3 roles for the user — client, moderator and admin. The user with the admin role will have access to a special route which will allow him to change roles of other users as well as view profiles of all the users.
Pre-Requisites
Following are the list of npm module (along with their versions) that are needed to be installed. By using the following command –
npm i node_module_name@version
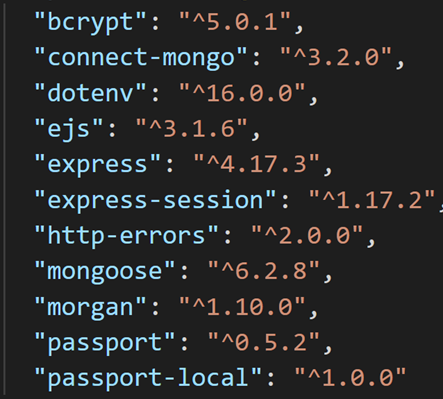
bcrypt- Helps us to hash password before storing them into database
connect-mongo- Used for custom session storage in the database.
ejs- ejs stands for Embedded JavaScript. It helps us generate HTML markup with plain Javascript.
Express– Used to define the routing of the entire application.
express-session– This module gives us a middleware that adds various custom properties every time a session is created.
http-errors-Creates and handles errors in the application.
dotenv– Used to store environment variables
morgan– HTTP request logger middleware
passport– Library used for authentication middleware. In this application, we will be using local strategy.
Initial Code Setup & Folder Structure
First of all, create the following folder structure,
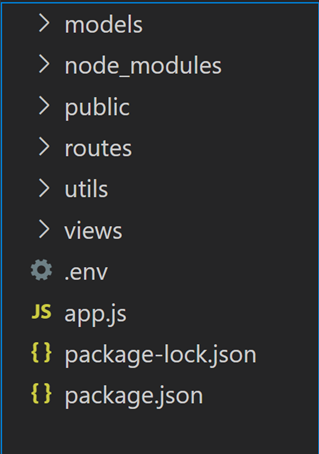
Models- To store all the model files
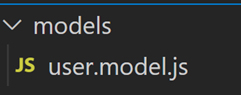
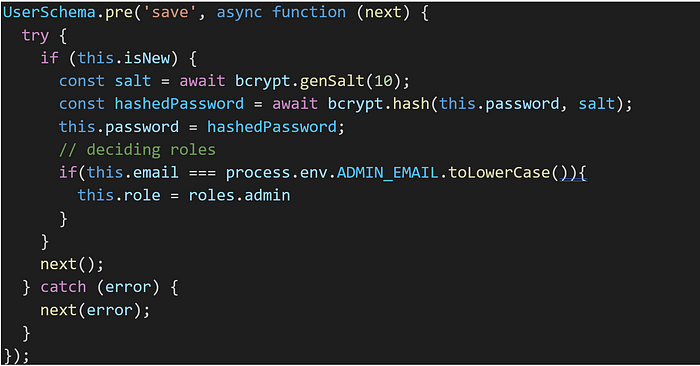
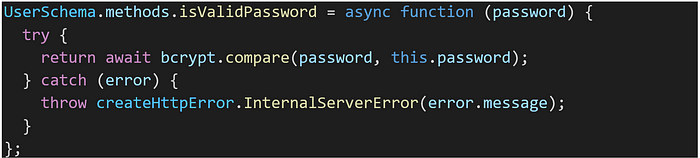
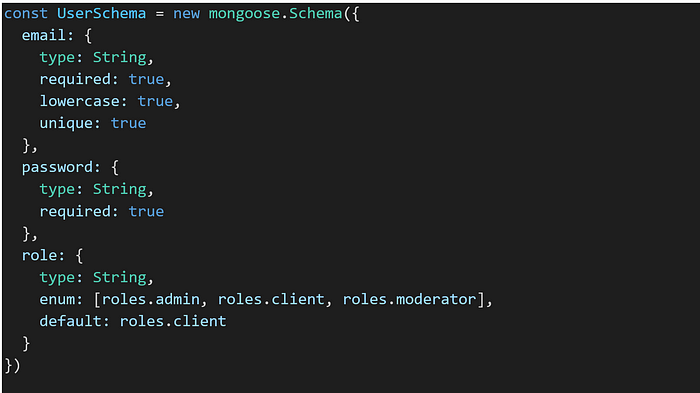
In the above file, we will be defining and exporting the user schema. The user consists of email and password.

Moreover, we will be defining the functions on the schema which will provide us with the following functionalities –
- Hashing password before saving
2. Function to validate the password passed through parameters
And lastly, exporting the model

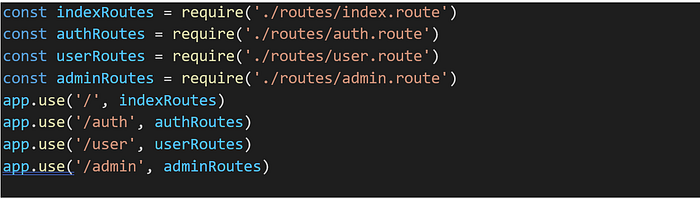
Routes –To store all the route files of the application
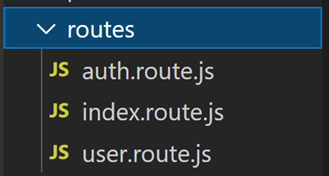
i. auth.routes.js — contain routes related to authentication
a. POST auth/login
b. GET auth/login
c. GET auth/logout
d. POST auth/register
e. GET auth/register
ii. index.routes.js — contain routes related to home page
a. GET /
iii. user.routes.js — contain routes related to user
a. GET user/profile
Views — To store all the view files

i) index.ejs

ii) login.ejs
iii) manage-users.ejs
iv) profile.ejs
v) register.ejs
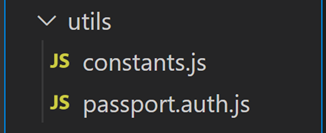
Utils- contain essential functions which have been used in the application
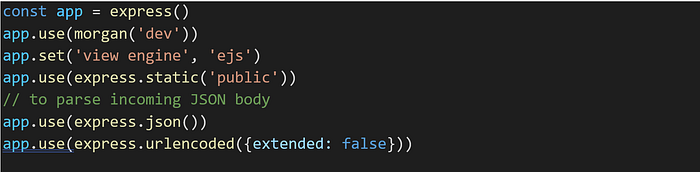
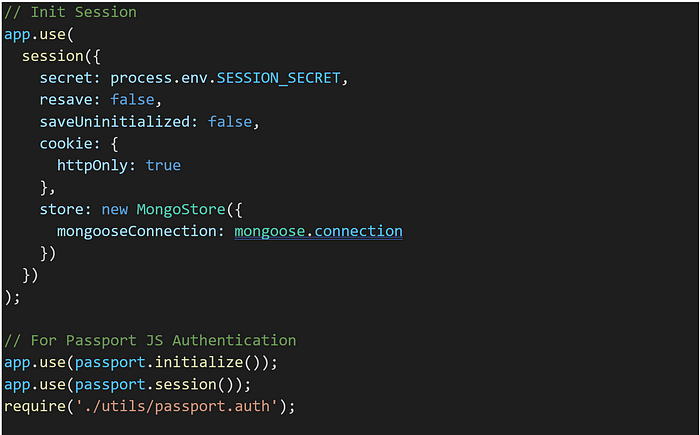
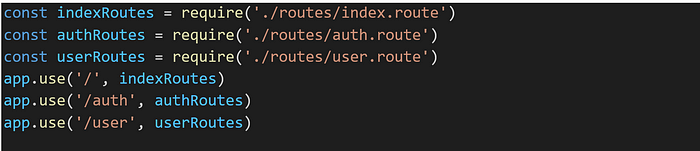
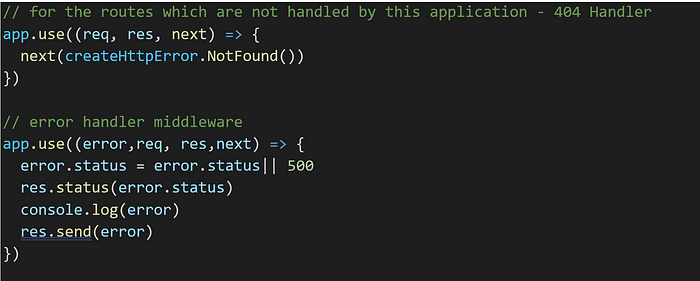
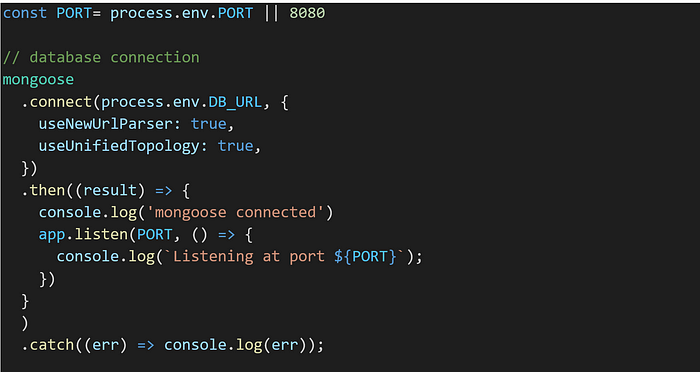
app.js –The starting point of the application. Must contain following piece of code.
i) Code to initiate the application and set views
ii) Configuration of passport.js
iii) Registering all the routes
iv) Error handling middleware
v) Database connection
Setup Views
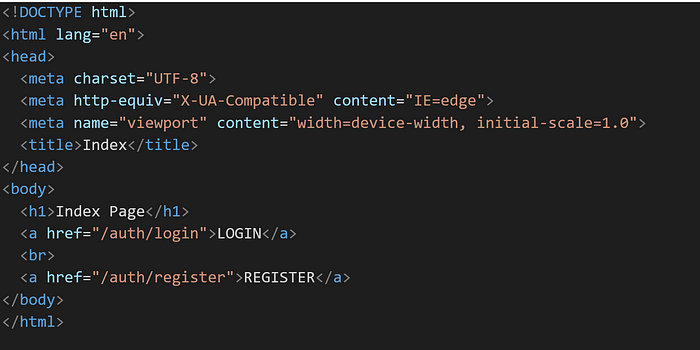
i. index.ejs
The file consists of the following code. This is the home page, serving on https://localhost:8080/
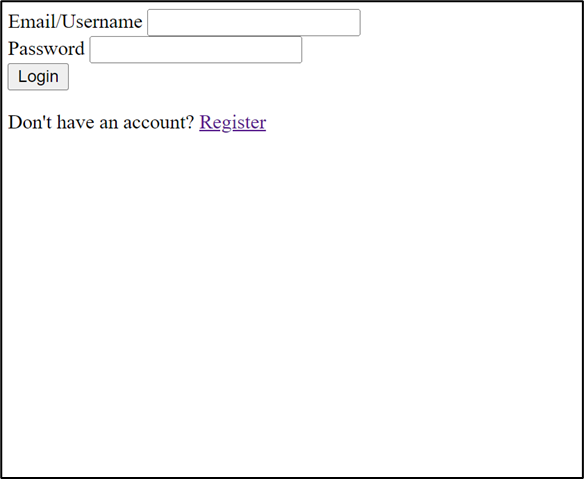
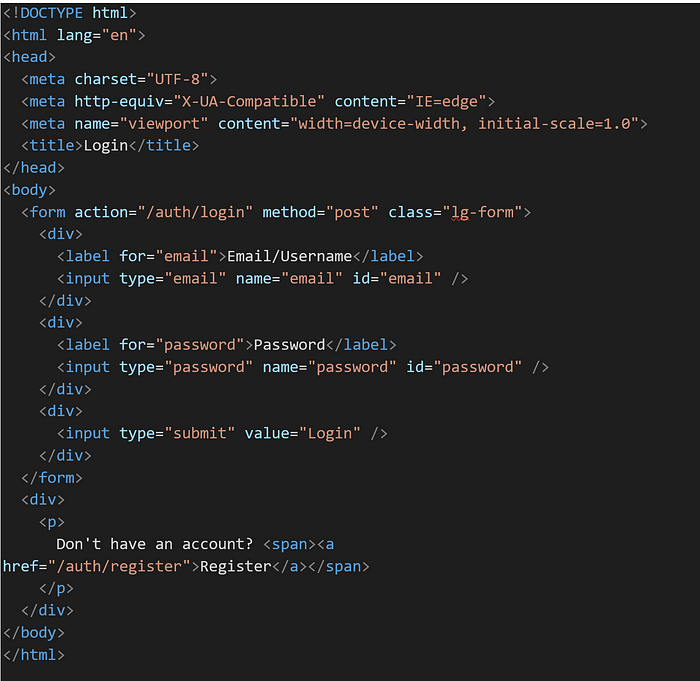
ii. login.ejs
This file is rendered on https://localhost:8080/auth/login. Consist of form which on submit sends a post request to /auth/login path along with credentials of the user in the request body.
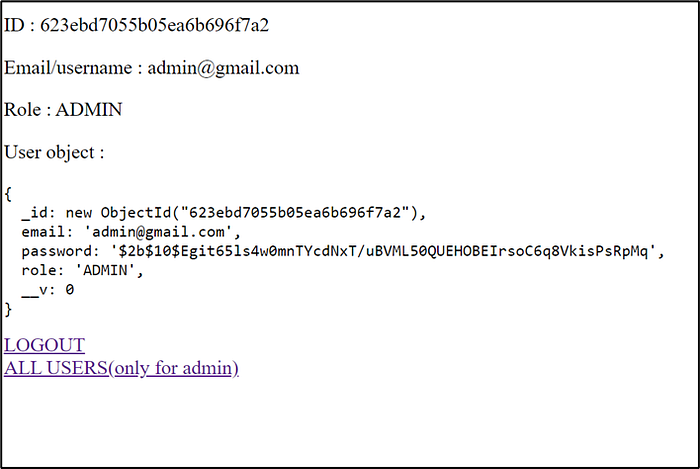
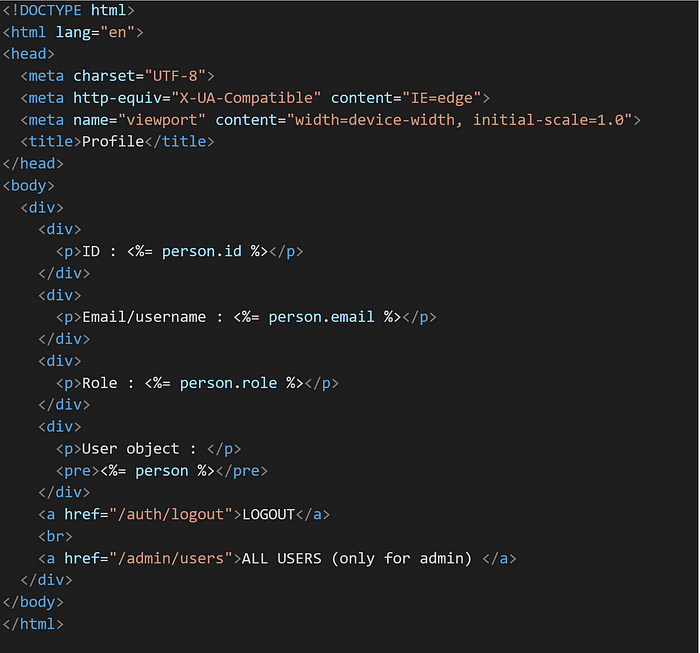
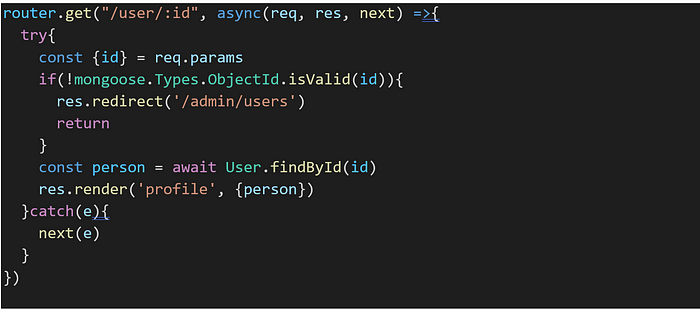
iii. profile.ejs
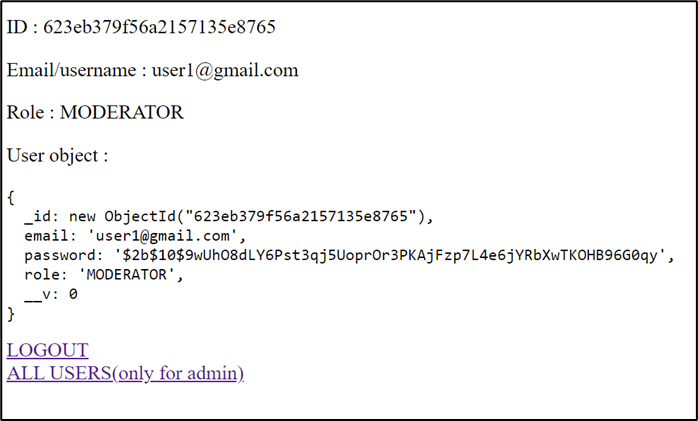
On this page, users can find their information. The object named person (which consist of user information) is being passed from /user/profile path (we will see code later). This page will be served on https://localhost:8080/users/profile (this is a protective route).
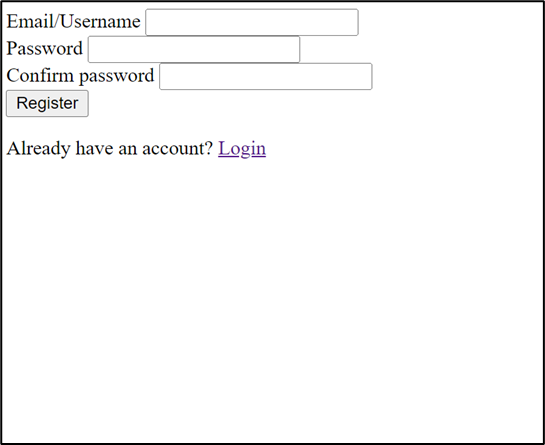
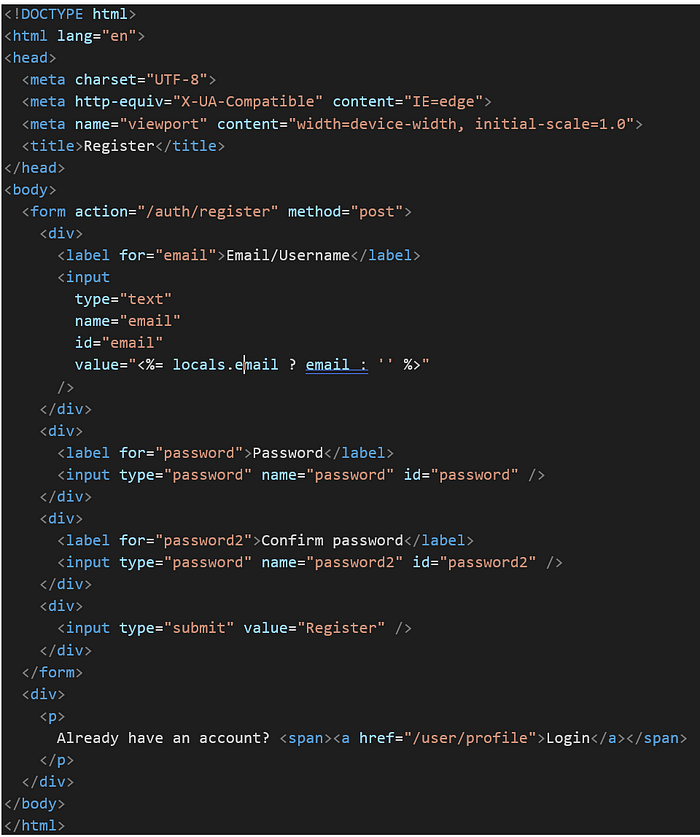
iv. register.ejs
This file is rendered on https://localhost:8080/auth/register. Consist of form which on submit sends a post request to /auth/register path along with credentials of user in the request body.
Setup Routes
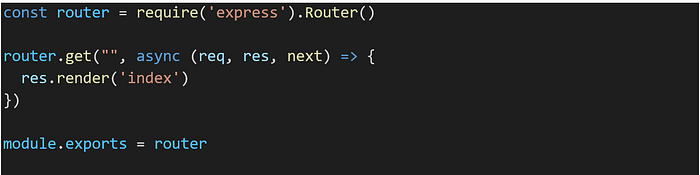
index.route.js
a. GET /
auth.route.js
a. GET /auth/login

b. GET /auth/register

c. POST /auth/login
In the following route, passport library provides us the passport.authenticate middleware. When the user will send post request to /auth/login path, this middleware takes credentials from request body and the on correct credentials, the user will be redirected to it’s profile page, otherwise will be redirected to the same page.

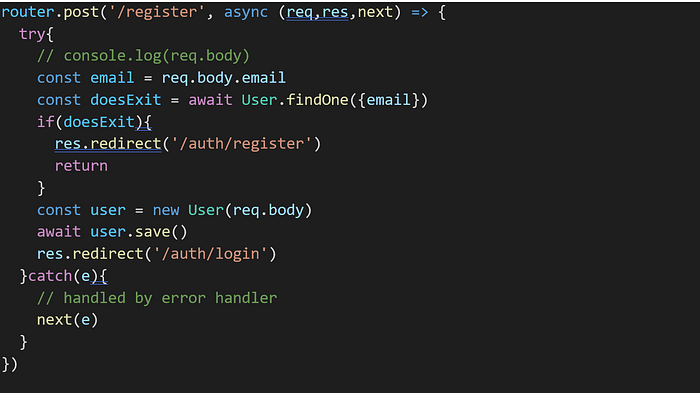
d. POST /auth/register
First of all, the email is extracted from the request body to check if the user has already exit or not. If exist, user will be redirected to the same page else it will be saved and redirected to the login route.
e. GET /auth/logout

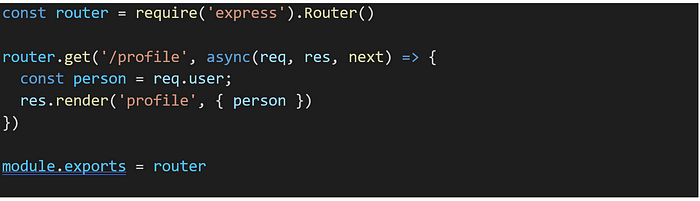
user.route.js
This route sends object named person to the profile.ejs view. Upon login, the passport.js library’s middleware sets a custom user property on req object. This req.user consists of all the information of currently logged in user.
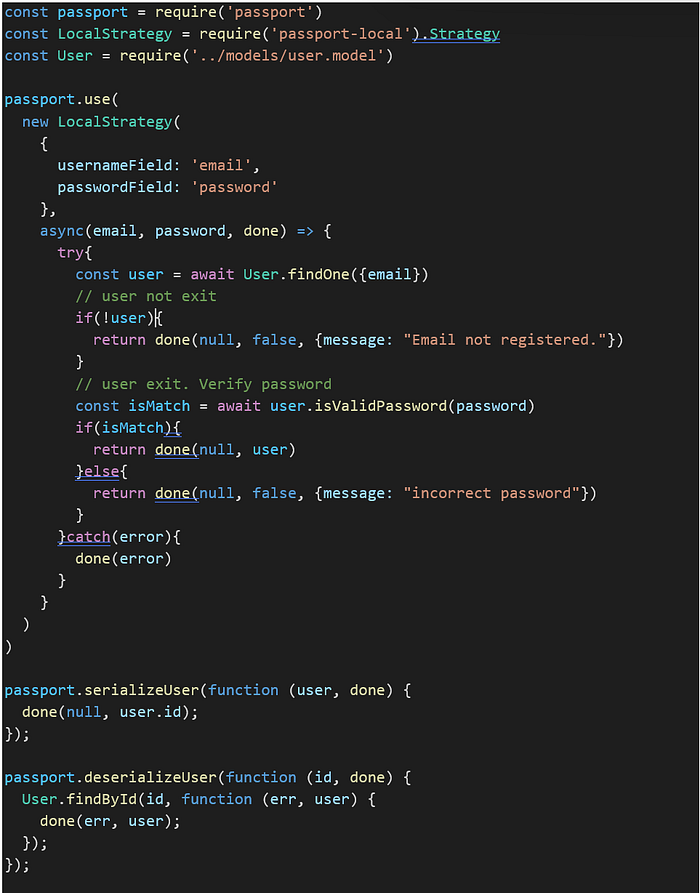
Logging users using Passport.js
Let’s start by creating a passport.auth.js file in the utils folder. Let’s take a look at passport.use() method part by part,
a. The first argument of LocalStrategy() is used to tell the function the name of the password as well as username field
b. When a user submits its credentials for logging in, passport.authenticate() will execute the callback function which we have passed as second argument to the passport.use(). If the authentication is not successful, the user will be directed to the /auth/login path
Setup Roles for users
Till now we have an application where user can log in and log out, however they all will have roles i.e. all the users (once logged in) can access the same routes. However, after implementing RBAC to our application, we can provide special routes which will be accessed to only those users which have a certain role. For example, User with the Admin role can view all the users present in the database.
Thus, we need to modify our current setup in the following way –
- Modify User Model
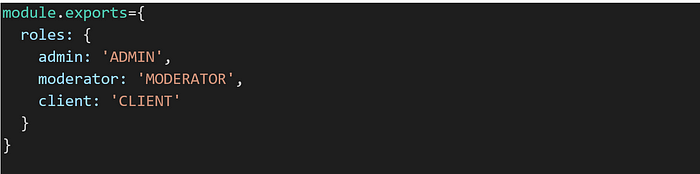
Create the following file in the utils folder:
In this file, we have exported all the roles which are present in the application.
Then change the user model:
Now, an extra field named “role” will be added. (setting default role to client.)
2. Add Routes for admin
Admin-user will have the following functionalities –
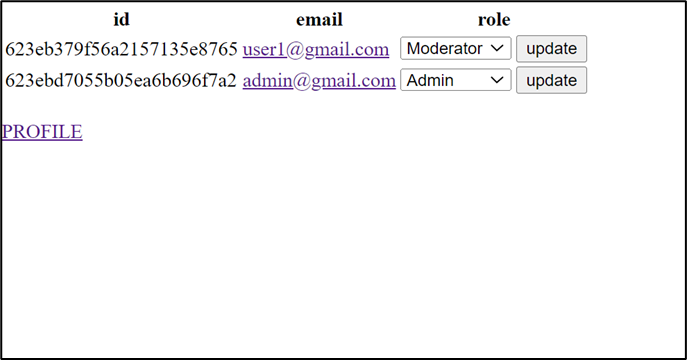
a. See all the users in the application
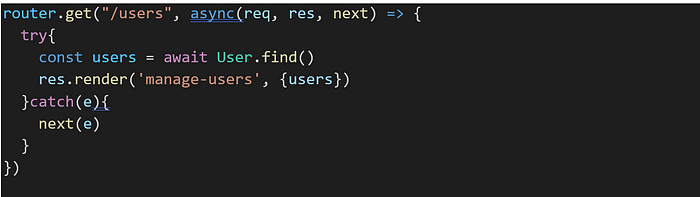
b. See the profile on individual user
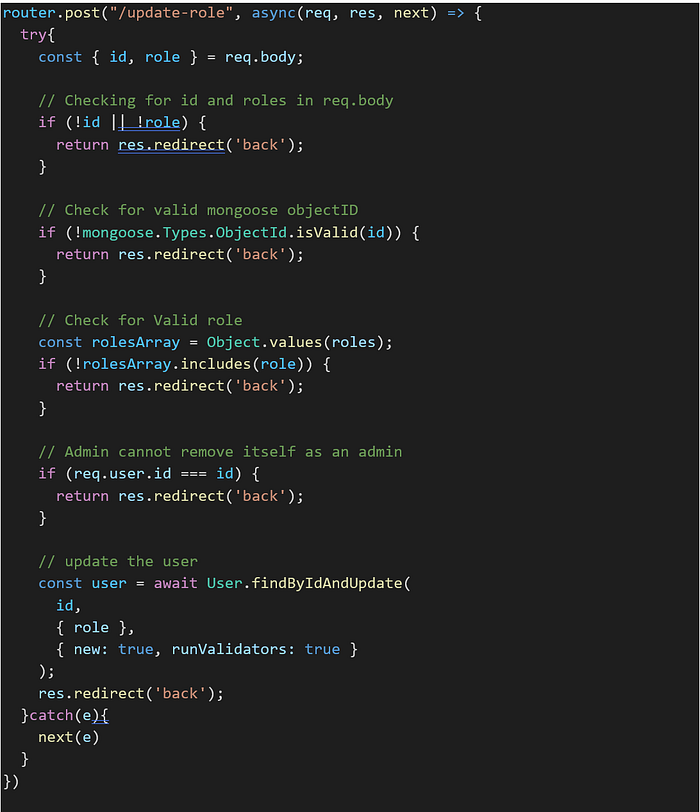
c. Modify roles of other users. However, can’t modify his own role.
3. Add ejs file for newly added routes
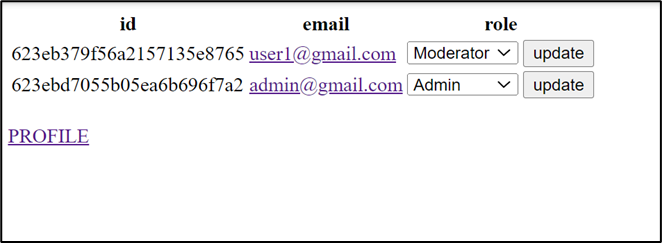
Now, a new file named manage-user.ejs will be added to the /views folder which will be visible only to the admin. From that page, the admin will make request to change the roles of various users.
Admin can also see profiles of other users. For example –
4. Re-Configure app.js file
With all the new files being added, we need to make few changes in our app.js file as well
Adding Middlewares
In the last section of this article, we will be discussing few middleware that needs to be added inorder to restrict few routes
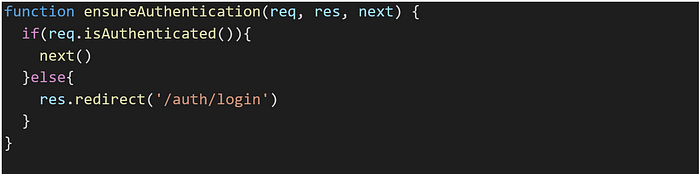
- Ensure Authenticated
This middleware make use of isAuthenticated() function added on request body by passport.js. next() is called only if the user is authenticated.
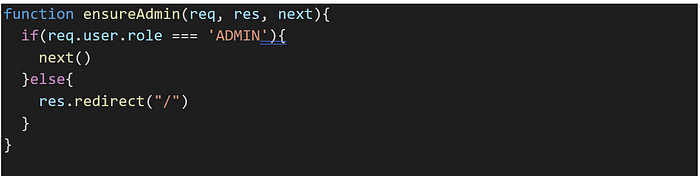
2. Ensure Admin
This middleware make use of .user property added on request body by passport.js. next() is called only if the user role is admin.
Now, call the above middlewares in the following places-
In app.js

In auth.route.js

Conclusion
With this, we can conclude the application.
More Info: xpertlab.com

