


Swift Or Dart: Which One’s The Best For Your iOS App Development
9th July 2021
How to Use Google Analytics to Improve UX Design
16th July 2021
Express.js is a battle-tested framework that is an absolute breeze to use. Even though Express is light, there is often a need for a backend system that is even faster. This allows your app to be snappier and more responsive.
This is where Fastify comes in. It is a framework that is more efficient and speedier than Express due to lower overhead. This means that your server will stay responsive even when dealing with heavy workloads. In fact, according to Sergey Onufrienko, Fastify is around 20% faster than Express.
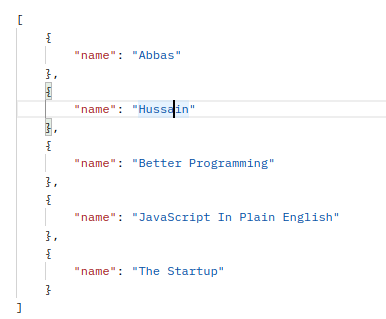
Other than speed, what does it have to offer? For one, it has a growing library of plugins. Most importantly, it has a schema system. For example, assume that you have the following response from your server:
What if your front end only wants the name field? By using Fastify’s schema system, you can set a filter and send the name field as a response:
In this article, you will learn how to build an API using MongoDB and Fastify as your backend framework.
Getting Started
Project setup
To initialize a Node.js app, run the following terminal commands:
mkdir fastify-tutorial #create directory
cd fastify-tutorial
cd fastify-tutorial
touch index.js #our main file
npm init -y #initialize the project
Let’s now install the required dependencies. Here, we want the following packages:
dotenv: To use environment variables.fastify: To build our backend.fastify-mongodb: Fastify’s plugin to help us interact with our database.mongodb: To allow us to parse URL parameters and convert them intoObjectIDfields.
To get these modules, run the following command:
npm i dotenv fastify fastify-mongodb mongodb
Next, go to your .env file and paste your MongoDB connection string like so:
CONNECT_DB = connectionString
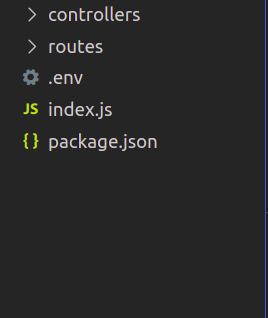
Project directory
In your project’s folder structure, make the following folders:
controllers: To hold our application logic.routes: This directory will hold our routes and their respective handlers.
In the end, your project’s folder structure should look like this:
Creating Our API
Home route
In /index.js, write the following code:
const fastify = require(“fastify”)({ logger: true });
const dotenv = require(“dotenv”);
dotenv.config();
fastify.register(require(“fastify-mongodb”), { forceClose: true, url: process.env.CONNECT_DB, }); fastify.get(“/”, function (req, reply) { reply.send(“Hello, world!”); }); fastify.listen(8080, function (err, address) { if (err) { fastify.log.error(err); process.exit(1); } fastify.log.info(`server listening on ${address}`); });- Line 1: Bring in the
fastifymodule. Theloggerproperty tells Fastify to log out the user’s routes and response codes to the terminal. - Lines 6-9: Use the
fastify-mongodbplugin so that we can use our database in our project. - Lines 11-13: If the user goes to the
/route, display a response. - Line 15: Run our backend on port
8080.
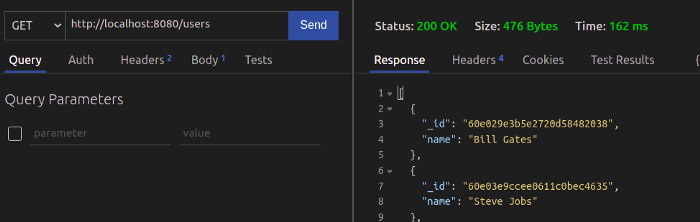
Let’s test it out. Go to your API client and make a request to localhost:8080.
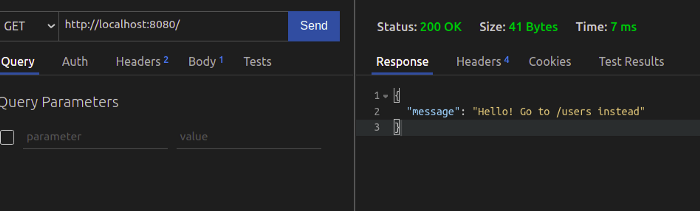
Great! Our code works.
Adding users to the database
In your controllers folder, create a file called users.controller.js. Here, write the following code:
- Line 4: Get the
userscollection from the database. - Line 5: List out all the users in the database and put them in an array.
- Line 7: In the end, send the result to the client.
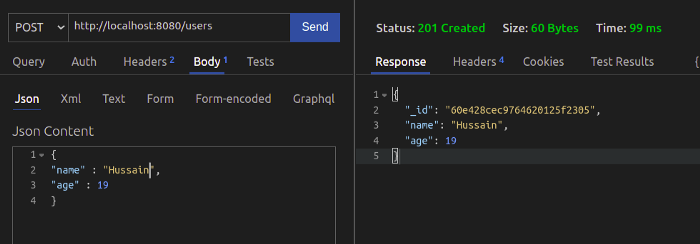
- Line 13: Store the
nameandagefields from the payload and store them in thedataobject. - Lines 14 and 15: Finally, save this data into the database and send this item to the client.
We have now written our logic. As the second step, let’s now register it as a handler.
In routes , create a file called users.js. Here, write the following code:
- Line 4: If the user goes to the
/usersroute, run thelistUserfunction. - Line 5: When the user sends data to the
/usersroute (aPOSTrequest), invoke theaddUsermethod.
We’re almost done! All that’s left is to register the /users route.
To achieve this, go to /index.js and write this line:
fastify.register(require(“./routes/users”));
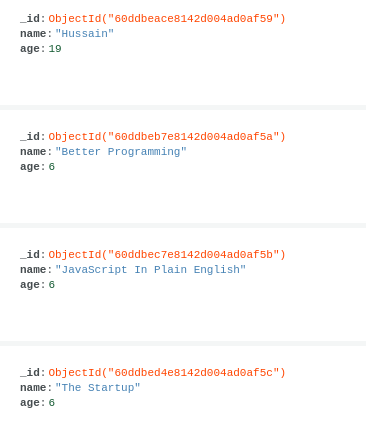
To get all the documents in the users collection, use a GET request:
To get all the documents in the users collection, use a GET request:
This was really easy!
In the end, /index.js should look like this:
Reading users from the database
In controllers/users.controller.js, add the following code:
- Line 4: Find the user with the particular
idfield. Thereq.paramsthe object contains the URL parameters. In this case, we only want theidparameter. - Lines 5-7: If it exists, return the result.
- Line 8: Otherwise, inform the client that this user does not exist.
Conclusion
If you are aiming to build an API that favors responsiveness and speed, then Fastify will fulfill your needs. Moreover, its vast ecosystem of plugins allows you to develop complicated features without writing lots of code.
