


CRM Feature And Benefits
29th August 2020
Digital E-wallet Mobile App
2nd September 2020
AWS CLI is one of many ways a developer can access and manage AWS services. You can also go use the AWS Management Console and AWS APIs to do the same, but why should you use AWS CLI?
Let’s look at some pointers.
- Very simple: There are no complex tasks required to start with AWS CLI. It’s very straightforward: download AWS CLI, and then install and configure it.
- Saves a lot of time: For example, if you want to check out all the S3 buckets in your account, you don’t need to login to your Management Console, choose the service, and then take a look at all the buckets. Instead, you can just type in a single command and get the list.
- Run powerful scripts: The biggest reason to use AWS CLI is that you can run scripts that can automate the cloud infrastructure partially or fully.
- Access all of AWS IaaS: It started with just EC2 access, and now you can manage every IaaS AWS resource from the CLI.
As already told, it is pretty simple to install and configure AWS CLI. It can be installed on nearly all OS including Linux, Mac OS X, and Windows.
Types of AWS CLI
AWS CLI version 1:
This is the first release of the AWS CLI tool, and it’s still supported by AWS. A lot of new features are introduced in AWS CLI version 2, but those features cannot be backported to version 1. To use those features, you must install AWS CLI version 2.
AWS CLI version 2:
This is the current AWS CLI version. You can only install version 2 as a bundled installer. Let’s take a look at all the new features of CLI version 2.
- Import AWS credentials from CSV files.
- Autocomplete server-side resource names
- Auto-prompt of AWS CLI parameters to help users. Using the –CLI-auto-prompt option, you can prompt for the next entry. For example, check out this image:

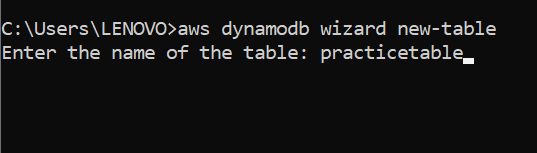
- Wizards have been added for configuring, dynamodb and lambda commands. For instance:
Installing AWS CLI
Prerequisites for the installation on Windows:
- AWS CLI version 2 is supported on Windows XP or later.
- AWS CLI version 2 supports only 64-bit versions of Windows.
To install AWS CLI for Windows, you will have to download the AWS CLI MSI installer. Download it from the below link:
AWS CLI Download link – AWS CLI MSI Installer
Configuring AWS CLI
After installing AWS CLI, you will have to configure it to use it. To configure it, you will have to provide access keys and the region.
First, let’s see how to check whether AWS CLI has been successfully installed in your system. For that, just type in the following command in your command prompt:
aws --version
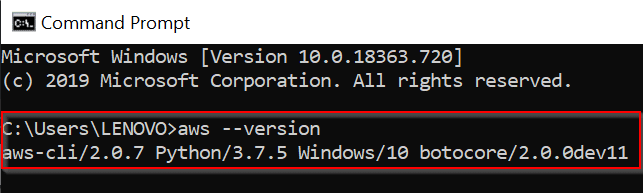
The above screenshot tells you that AWS CLI has been successfully installed. Now, let’s configure it. Before starting it, get your AWS access and the secret access keys. If you do not have them, follow these steps:
- Login to your AWS account
- Click on the AWS account name ( dropdown ) on the top right.
- Select My Security Credentials
- Click on the Access keys option. If you already have the Access Key and the Secret access key, then use them. If there is no key, then click on Create New Access Key.
- Copy the given key and paste it in notepad.
Type in the following command to start the configuration process –
aws configure
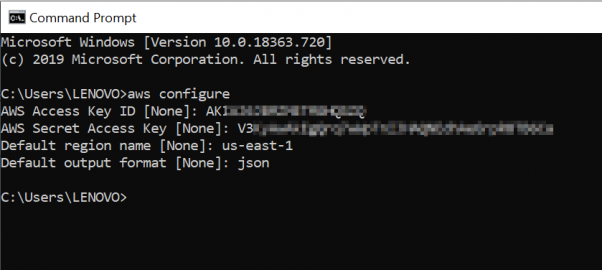
Once you have entered the Keys, Default region name and output format hit Enter. The configuration is successfully done. Let us do a simple test to check whether our AWS account has been configured. Type the following command:
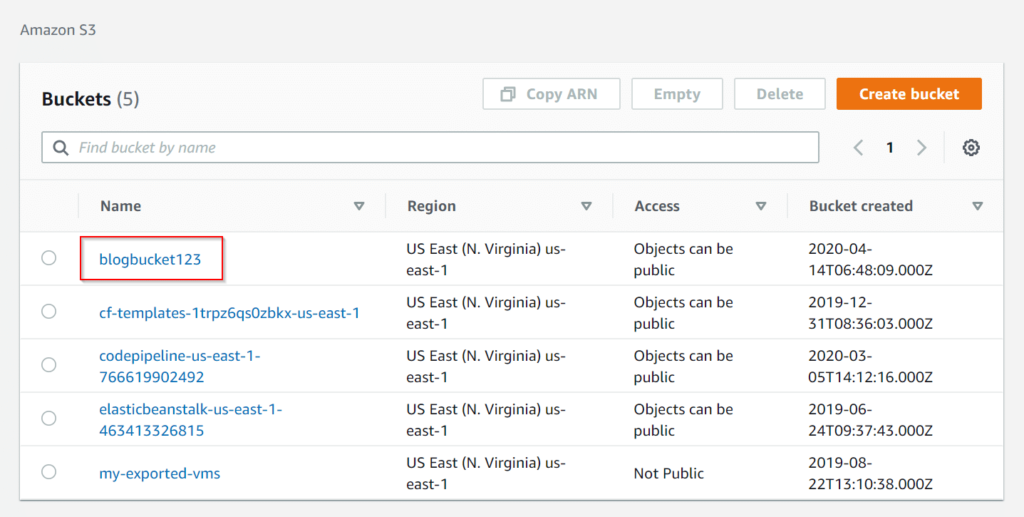
aws s3 ls
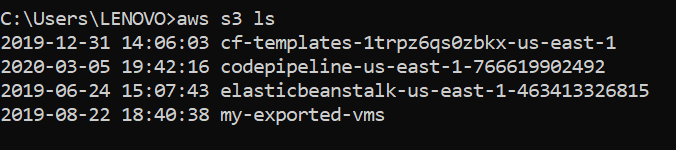
This command lists all the S3 buckets in the configured AWS account. If this command runs successfully, then the configuration is successful.
Command Structure and CLI options
First, let’s take a look at the command structure of the CLI before using some of the AWS CLI commands.
Sample CLI syntax:
aws <command> <subcommand> [options and parameters]
Let’s decode this syntax.
- aws – Base call for the CLI
- <command> – Corresponds to the AWS service which is going to be accessed
- <subcommand> – Specifies the operation which should be performed
- [options and parameters] – CLI options and the service’s parameters can be mentioned here
A few CLI options:
- –region – Specifies the AWS region to which the command’s request to be sent.
- –output – Specifies the output format for a given command. The output formats you can choose from are JSON, YAML, text and table.
- –cli-read-timeout – Specifies the maximum socket read time in seconds. If it is 0, then the timeout is indefinite.
You have installed, configured, and tested the AWS CLI. Now, it is time for a hands-on. Let’s do a few operations on S3.
You can access S3 resources from the CLI itself, and it is possible because of the simple command which was used right after you installed the CLI. It listed out all the buckets available in your AWS account. Now, let’s start with creating a bucket using the AWS S3 CLI.
The command to create a bucket:
aws s3 mb s3://bucket-name

The bucket has been created. Let’s upload an object to the bucket from the CLI. To do that, use the following command:
aws s3 cp filename s3://bucket-name
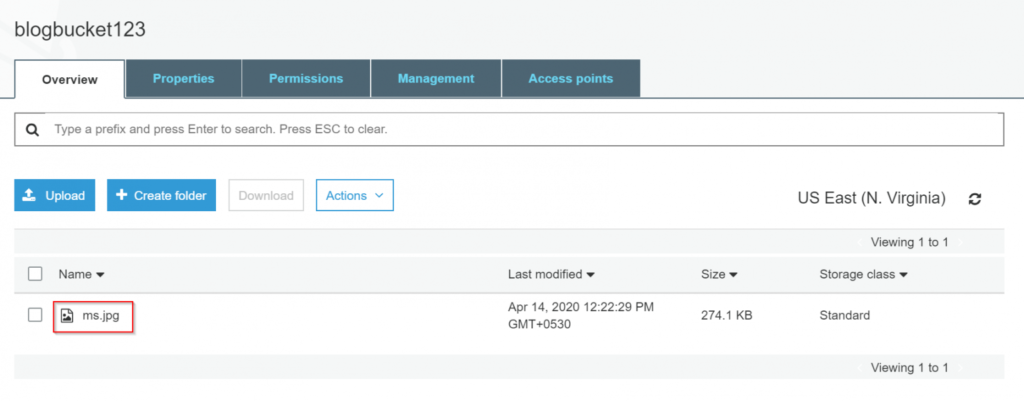
You have uploaded a file to the created bucket successfully. Before finishing off with this hands-on, let’s delete the created bucket. Use the following command to delete the bucket:
aws s3 rb s3://bucketname
Please note that this command will not work if you have objects inside the bucket. If you have a file inside the bucket, then first you have to remove the file and then remove the bucket. To remove the file, use this command:
aws s3 rm s3://bucketname/path/filename

Now, you would be convinced that the AWS CLI tool is very handy and convenient for a developer who uses AWS resources quite often. You can push files into an S3 bucket, and a lot more operations with this tool. This blog has given you a head start on AWS CLI.
